Activities

Day 1 – Valentine Heart Bracelet

Valentine Heart Bracelet 

This is a very pretty bracelet which takes no time to make.
To get the same beads, you need to buy this kit from the Oriental Trading Company. It comes with all the beads and the stretchy cord.
http://bit.ly/OTC_heart_bracelet
But any heart shaped beads with a vertical hole for the cord will do. And don’t forget to buy the stretchy cord!


What you need:

  • Oriental Trading Company Kit or
  • 12 Heart-shaped beads about 1/2 inch long (1.5 cm)
  • Stretchy cord about 12 inches long (30 cms)


How to do it:

Valentine Heart Bracelet

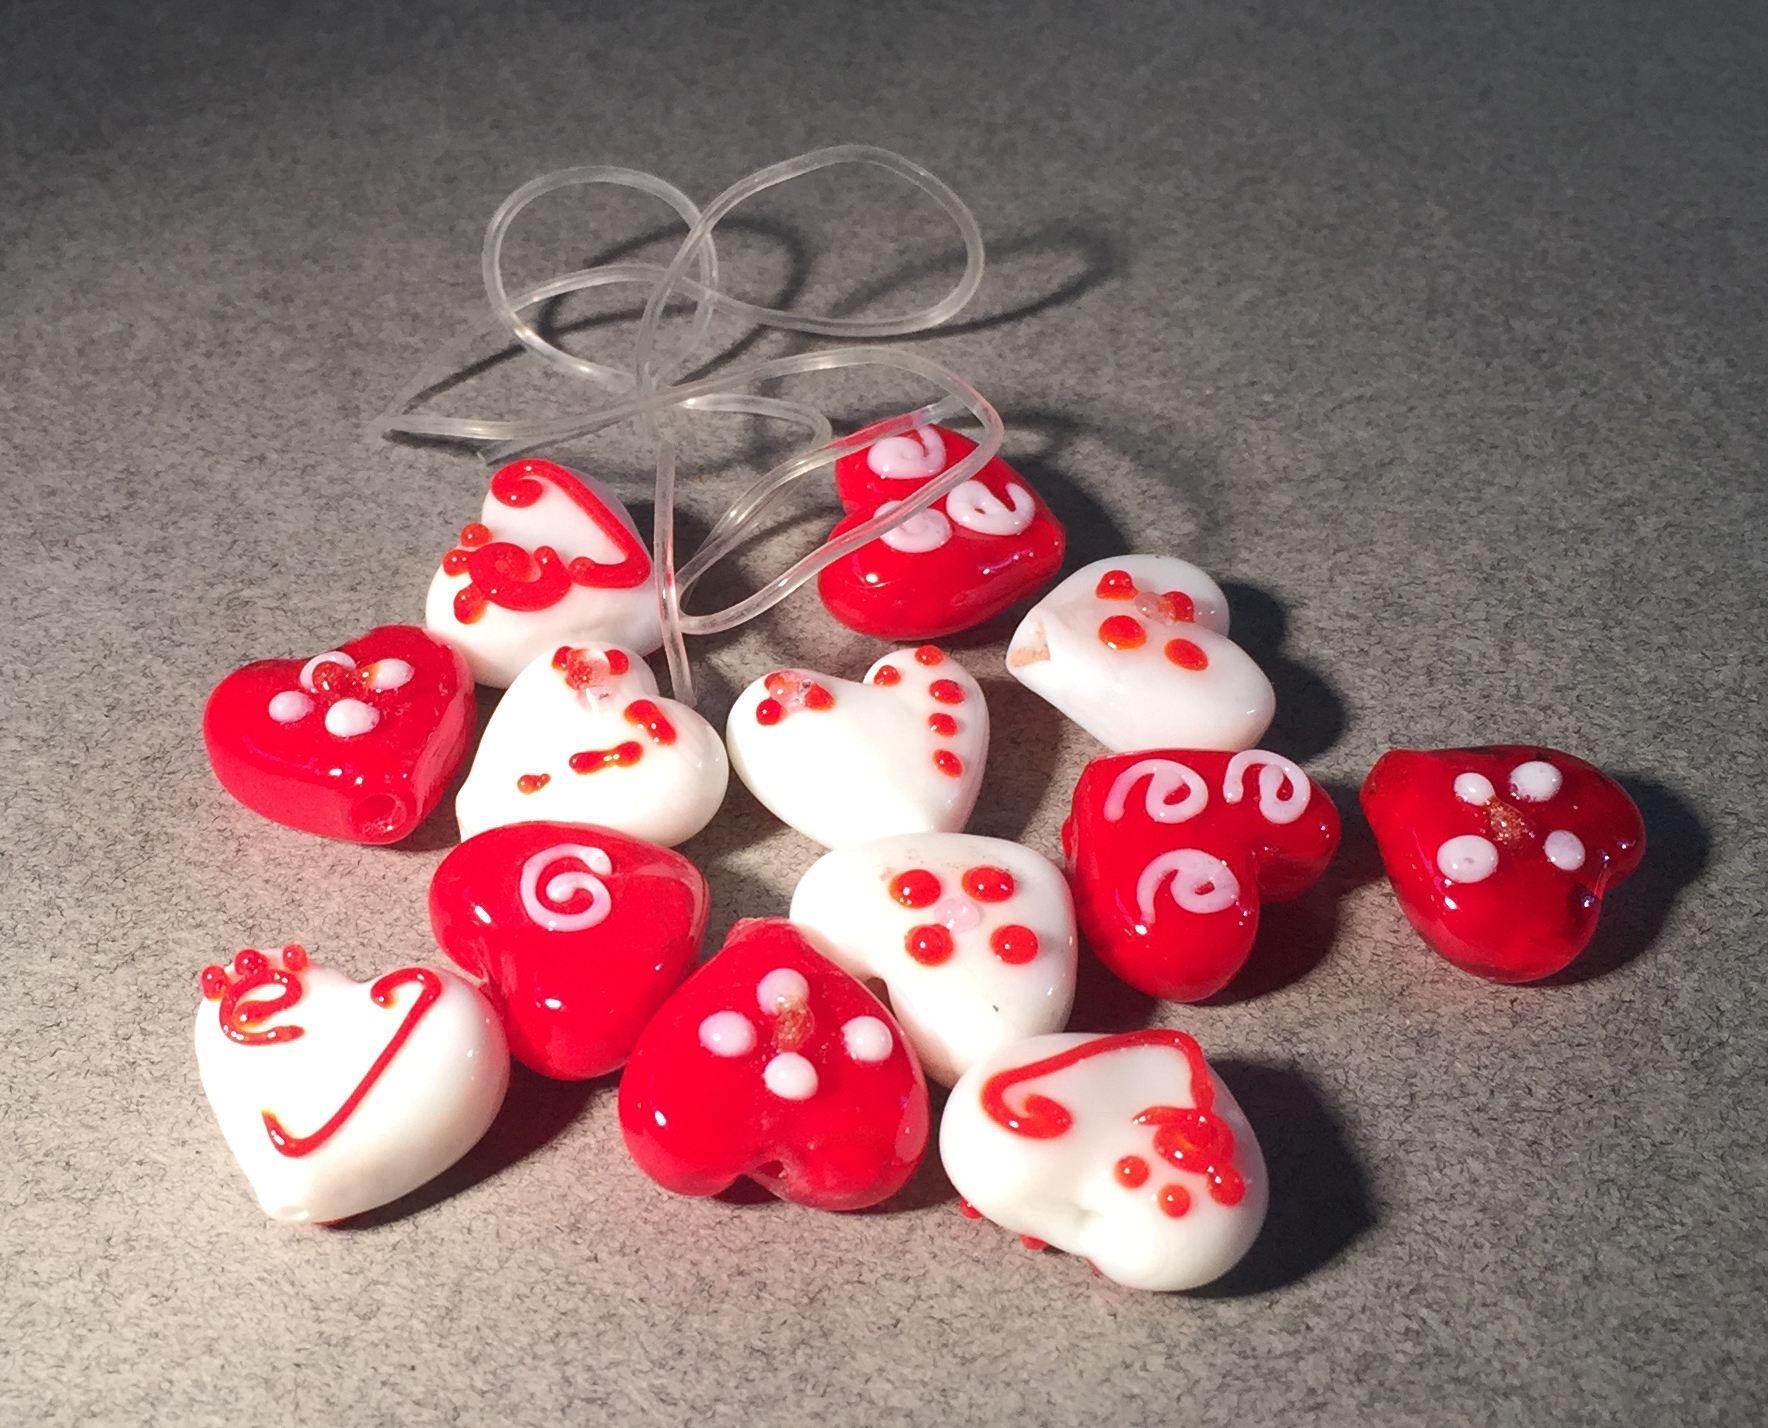
Valentine Heart Bracelet Beads and Stretchy Cord

  • First, choose the beads you want to use and how many – depending on the size of the wrist you’re making it for.
  • Then lay out the pattern you want.
  • Using the stretchy cord string the beads in the order you chose.

  • When it’s done, tie a knot in the cord and repeat several times to get it as tight as you can.  You can also dab a little bit of glue on the knot.


Valentine Heart Bracelet

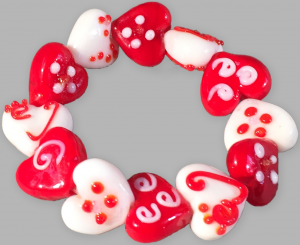
Valentine Heart Bracelet Completed

And you’re done!


Heckerty’s 12 Days of Christmas — The Video!

Now sing along with the 12 Days of Christmas!

Get your friends and sing the song for everyone. Give it to your parents and teachers. Upload your own version of the 12 Days … Heckerty’s 12 Days of Christmas is bound to become a Classic Christmas Carol.

And don’t forget our marvelous craft projects ready to make with your kids, and designed to be completed in 30 minutes or less.

Check them all out at <https://heckerty.com/activities/>

Heckerty-12-Days-of-Christmas-banner-01

So, Make Your Friends and Family Laugh.

And Smile.

And Enjoy.

Share Heckerty with them.

Right here, right now —

Heckerty’s 12 Days of Christmas — The Video!

FREE Heckerty downloads – limited time


Heckerty’s Halloween Hacks – Day 31 – Halloween!!

Halloween – It’s Heckerty’s Birthday!!

Every year on Halloween, Heckerty celebrates her 409th Birthday!

And this year – we’re announcing the release of a new app Heckerty’s Halloween and a new book to go with it!

You’ll find links to download the app on our Get Heckerty page!

icon_hh-app

And the book will be available on Amazon in a couple of days!!

icon_hh

We are all VERY EXCITED about these new stories and hope you all love them as much as we do!

HALLOWEEN IS HERE – have an amazing time and Safe Trick or Treating to you all!!!


Come back for Heckerty’s Twelve Days of Christmas Hacks starting on December 12th!!!

Heckerty’s Halloween Hacks – Day 30 – Make a Trick or Treat Bag

Make a Trick or Treat Bag 

To make a trick or treat bag –

This is  a very simple hack that uses up paint and stickers from earlier projects.

We painted our bag black, but you can use any color you like.

Just make sure the paint covers the entire bag and nothing shows through.

As you see with our bag, it needed two coats of paint.

Decorate the bag anyway you want – we used stickers.

You could use paint, fabric, pictures from the web, whatever you want!

What you need:

  • Gift bag or store bag
  • black acrylic paint
  • foam stickers
  • Googly eyes
  • Other decorations!

 How to do it:

Make your own bag for trick or treat

Make a trick or treat bag

1. Pour black paint into a bowl 

2. Paint the bag black


    3.  Add a second coat of paint if needed.
    4.  Let it dry really well!
    5.  Use the left over stickers from the earlier projects and put them on the bag!
    6.  Trick or Treat anyone?


Make a Trick or Treat Bag

Decorate Your Trick or Treat Bag

Heckerty’s Halloween Hacks – Day 29 – Apple Smiles

Apple Smiles – for a great grin!

What you need: 


  • fresh apples
  • peanut butter
  • small pieces of marshmallow

What you do:

1. Slice the apples very fine

2. Put peanut butter along one side

3. Put another piece of apple on top

4. Arrange the two edges of the apple to look like lips,

5. Insert small marshmallow chunks to look like teeth!

Apple Smiles - Heckerty's Halloween Hacks Day 29

Apple Smiles with peanut butter and marshmallow chunks


Heckerty’s Halloween Hacks – Day 28 – Make a Haunted Gingerbread House

Make a Haunted Gingerbread House

This is best done with a kit – we got ours at Trader Joe, but many supermarkets have them.

The kit contains everything you need:

  • gingerbread house – roof, walls etc
  • orange frosting to stick things together
  • black frosting to stick other things together
  • jelly beans for decoration
  • bats for decoration
  • bones for decoration
  • other candies for decoration


How to assemble it:

GBHouse1
Gingerbread House for Halloween

  1. Take the pieces of the house and lay them out.
  2. Take the frosting and draw the lines needed to attach the house pieces.
  • Add the walls and hold pieces still for a few minutes until the frosting has set
  • Add the roof using the icing to make sure it holds tight in place

Haunted Gingerbread House

Haunted Gingerbread House

  • When the frosting has set (at least 30 minutes) start to decorate.
  • Use jelly beans, colored sugar balls, and colored frosting to add character!
  • Also frost the cookies – the cat and the pumpkin.

Haunted Gingerbread House

Haunted Gingerbread House

Make a Gingerbread House

Make a Gingerbread House

  • When it all comes together – admire your talent!


Haunted houses are fun to eat.

Wait ’til tomorrow for another treat!


Heckerty’s Halloween Hacks – Day 27 – Halloween Bat Ornament

Halloween Bat Ornament 


What you need:

  • 3″ round plain glass tree ornament
  • black acrylic paint
  • sheet of black foam
  • white paint
  • orange paint
  • googly eyes
  • foam glue


How to do it:

Halloween Witch Ornament - Clear glass Christmas Ornament
Clear glass Christmas Ornament

  1. Pour some black acrylic paint into the ornament.
  2. Swirl it round until the inside of the ornament is completely covered in paint.


  • Set the ornament to dry with the top pointing down so that unused paint drips out.
  • Make wings from black foam.
  • Glue to sides of ornament.

black_ornament for bat

Black ornament to makeHalloween bat ornament body


  • When the ornament is dry inside, decorate it to look like a bat using orange paint for the mouth, googly eyes and white paint for the teeth!

Add teeth, mouth and eyes to black bat ornament

Halloween bat ornament with face paint!

Great Halloween bat ornament

Halloween bat ornament ready to fly away!!

  • Add wings cut from foam using foam glue or have an adult help using hot glue.
  • Glue to sides of ornament.


Haunted houses are fun to eat.

Wait ’til tomorrow for another treat!


Heckerty’s Halloween Hacks – Day 26 – Oreo treats

Oreo Cookie Treats for Halloween


Nothing says Halloween more than candy corn and decorated Oreo cookies.

So here are a few ideas for decoration!

Witches’ Hats Oreo Cookies

What you need:

  • Oreo Cookies
  • Chocolate frosting
  • Hershey Kisses

1. Cover the Oreo cookie is thick chocolate frosting

2. Put a Hershey kiss on top to create a Witch’s Hat

Oreo treats

Oreo treats

Heckerty’s Halloween Hacks – Day 25 – Dirt Cake

Dirt Cake – Perfect for Witches to play in!!

It’s not so much how you make this weird sounding “cake” –

it’s more how you present it!

And it’s so easy to make, you can do everything in 15 minutes.

For one dirt cake you need:

  • 2 packets of chocolate pudding
  • 4 cups cold milk
  • 12 Oreo cookies
  • gummy worms
  • plant pot or
  • kid’s pail
  • foil or press ‘n seal
  • whisk


How to do it:


IMG_7629

  • In a large bowl whisk the milk and the chocolate pudding mix
  • Continue until well blended
  • Put the Oreo cookies into a zipped sandwich bag
  • Crush them with a rolling pin until there are crumbs
  • Carefully stir the crushed cookies into the pudding mix so it looks like dirt!
  • Leave in the fridge for 10 minutes to thicken
  • Line the inside of a clean, new plant pot with foil or press ‘n’ seal
  • Pour in the “dirt” mix
  • Decorate with gummy worms!!


Coming up – 3 ways to decorate Oreo cookies for Halloween!

Heckerty’s Halloween Hacks – Day 24 – Make a Black Cat from a Paper Plate

Black Cat from a Paper Plate 


What you need:

  • A paper plate painted black
  • template from the web (see below)
  • scissors
  • googly eyes
  • glue
  • white paint
  • pink paint
  • scotch tape


How to do it:

IMG_7555
Black Cat from a Paper Plate

  • Paint the backside of the paper plate black and let dry.
  • Turn the plate over to the unpainted side.
  • Cut out the body using the pattern.
  • Cut out the tail and head from the remaining plate. Set scraps aside.


  • Use tape to attach the tail and the head to the back of the plate, using the image as a guide
  • Glue on wiggle eyes and paint a pink dot for the nose
  • From the scraps of black plate, cut thin whiskers of equal length
  • Glue to the cat’s face
Make a black cat from a paper plate

Black Cat takes shape from paper plate

Black Cat from a Paper Plate

Black Cat now has a face and whiskers


Make a Black Cat from a paper plate

Make a Black Cat from a paper plate – see how easy!

Our cat was based on this awesome
one we found online at:

craftsbyamanda.com

Thanks, Amanda!

http://craftsbyamanda.com/2011/10/paper-plate-black-cat.html

        Only ONE WEEK til Halloween!!      Tomorrow – Dirt Cake